


 24/7 Emergency Service
How to Fix Water Stains On the Ceiling
6/11/2020 (Permalink)
 Water Damage Repair Services
The longer you own a home or property, the more issues are likely to arise. Repairs range from simple to major - fix it and forget about it. But water damage leaves a reminder.
As you wash your hands at the sink, you may ask yourself how a crystal clear fluid could leave such unsightly brown spots on the ceiling and walls? And does this mean another repair ordeal?
When water mixes with other materials, it leaves a stain (such as drywall particles, plumbing residue, mineral deposits, etc.). Once it dries, these other elements stay on the surface. So it’s not the water itself that stains the ceiling, it’s what emerges to the surface.
Before you call the contractor or make that trip to the hardware store, let us share some tips on how to fix a water stain on the ceiling.
Step 1: Locate the Source of the Leak
Eliminating the appearance of the problem doesn’t mean there is no longer a problem. This first step calls for an investigation of what caused the stains in the first place. Addressing the cause of the issue saves you the trouble of having to remove the stains all over again.
As professional mold remediation specialists, SERVPRO of North Irving recommends that you inspect for any mold issues. Mold is unhealthy. If you find signs of mold around the affected areas but can’t find the source of the water causing it, call SERVPRO of North Irving. We’re here to help you prevent a mold problem from getting worse.
(If you’ve already taken care of the necessary repairs and checked for mold, skip ahead to Step 3.)
A water spot signals an issue that may lead to further damage such as electrical problems. It may be necessary to cut a hole into the ceiling to inspect for leaks and check the condition of the joists.
Below are common causes of water damage.
Roof
Sometimes the water isn’t coming from the dwelling but from the sky. If the stain is on your ceiling and no plumbing is passing through this area, it’s likely there is a leaky roof issue.
Shingles may need to be replaced, and seals may need to be redone on the roof above the damaged area. A roof inspection may be needed to check for further damage beneath the shingles, such as a failing waterproofing layer.
Pipes
Of course, the other source of water in a home is the plumbing that carries running water into the house. It’s common for water to run along the rafters and drop to the ceiling.
When the roof seems to be in good shape with no leaking issues, this calls for a plumbing investigation. Check for potential plumbing issues surrounding the stain.
Step 2: Determine the Extent of the Water Damage
A multipoint inspection uncovers any additional damage or contributing factors to the leaks around the walls or ceiling. This is especially important for finding and eliminating mold or mildew from the home.
For example, if you find a leak around your shower, this may be an indication of a bigger problem. The deterioration of pipes, the radiator, caulking, or the shower pan are common issues with damage around a shower.
The older a home is, the more chances there are for things to break down. For example, caulking in the bathrooms only lasts about 10 years and should be redone as needed.
Shower pans wear out (with plastic ones having a shorter shelf life). If you suspect the shower pan is giving way, you should check the subfloor. For those in a pier and beam structure, this involves entering the crawl space beneath the house. Check the floor joists for further signs of water damage.
An aging radiator may also cause leaks. Such leaks are caused by a breakdown of joints, valves, fittings, or vents. Rule out this potential cause with a close inspection of your radiator unit.
Any of the above tasks may involve removing wall partitions. Hopefully, you can keep these pieces intact so that they may be put back (wall sections with mold or mildew should be replaced with new materials). If you can reuse these pieces, we’ll go into how to fix a water stain on the ceiling.
Step 3: Fixing the Ceiling Water Stain
If the stain is from a water leak that was repaired a long time ago, you can cover the water stain on the ceiling with the following methods:
- Bleach solution
- Oxiclean solution
- Removing with sandpaper (This may worsen the look of the ceiling. This might be acceptable for a utility space such as a garage).
- Drywall replacement
- Paint
Removing ceiling water stains with bleach is a more popular method.
How to Remove Water Stains From the Ceiling Without Painting
Because it can be hard to match old paint and have it blend well, we recommend trying the bleach method first for ceiling water stain repair. Bleach is a widely used stain remover for clothing and linens, so it makes sense that it would remove a water stain from the ceiling.
Steps For Removing Water Stains From The Ceiling With Bleach
- Assemble your supplies:
- Ladder
- Gloves
- Safety glasses or goggles
- “Paint clothes” (that you wouldn’t mind getting damaged)
- 2 containers
- Sponges (at least 2)
- Bleach (or Oxiclean as an alternative)
- Water
- Tea towel
- Drop cloth (to protect carpeting)
- Clear the area below the ceiling. Remove anything that would become damaged and discolored by the bleach. Bleach stains are permanent. Put down your drop cloth (if needed).
- Put on your work clothes, goggles, and gloves.
- Ensure the room is well ventilated with either an open window or fans.
- Mix 1 part bleach with 3 parts warm water into one container and have a second container with water. (For Oxiclean, mix 1 scoop or 2 tablespoons with 1 pint of warm to hot water.)
- Dip one sponge in the bleach solution and wipe the stain.
- Rinse with a second sponge soaked with plain water.
- Dry with a tea towel.
- Repeat as necessary.
Hopefully, this method will save you a trip to the home improvement store. If not, you can try painting it.
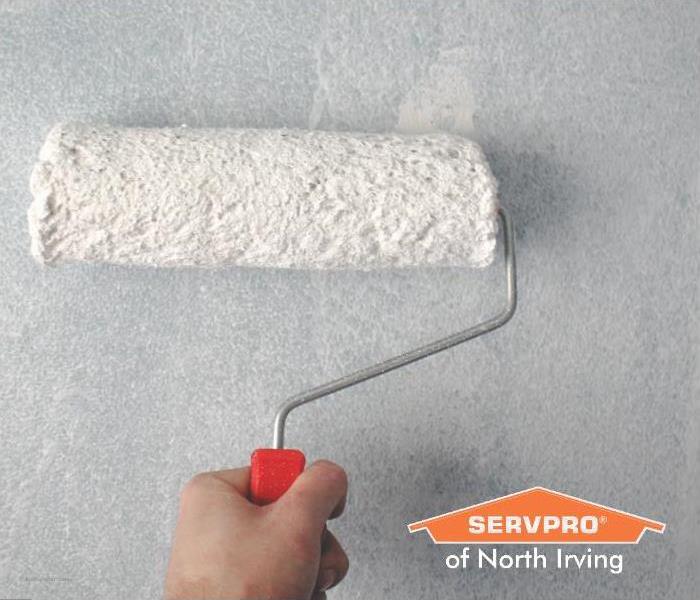
How to Fix Water Stains on the Ceiling with Paint
When bleaching doesn’t work, the damaged wall can be replaced or the stains can be painted over. Cutting out the stains and replacing the drywall is an option, but it’s extra work.
Steps to Paint Over a Stain
- Gather supplies:
- Ladder
- Safety goggles
- Paint clothes
- Drop cloth
- Paintbrushes or paint rollers (if not using spray paint)
- Oil-based undercoat
- Stain-blocking or stain-sealant primer and paint. (For best results, select products intended for water stains.)
- Clear the area of any items that may be damaged by substances and spread out your drop cloth.
- Prep the affected area by cleaning it (see bleach cleaning directions above) and let it dry. Sanding off some of the stains may also prep the area.
- Remove any loose paint flakes.
- Apply the oil-based undercoat and let it dry overnight.
- Carefully apply the stain-blocking primer. Kilz is a popular brand for this. (Upshot makes a spray-on product intended to match with aged white ceilings.) Let the primer dry.
- If the stain still shows, apply another coat. (Two coats is usually enough.)
- Assess the appearance of the primer. If the stain no longer shows and it looks acceptable, adding coats of paint isn’t necessary.
- For a finishing touch or to make the repaired area blend in with the rest of the ceiling, apply the best match shade over the primed area.
- Apply one coat of paint at a time until you achieve the desired look. (Retexturing the ceiling may be required.)
Before long, you’ll have a ceiling that looks normal again and blends in with the room as it should.
Contact SERVPRO North Irving if You Need Any Help
At SERVPRO of North Irving, we are all too familiar with the damage water causes to a structure. We hope these tips on how to fix a water stain on the ceiling help you remove those blemishes that distract from the beauty of your interiors.
We must remind property owners to be mindful of the potential for mold growth around water damaged areas. Mold and mildew must be managed to maintain a healthy living environment.
SERVPRO of North Irving has decades of experience in mold remediation, water damage restoration, and ceiling repair. We’re here to help you address mold issues along with water damaged ceilings and walls. Call us today at (972) 986-7677 or complete our super easy contact form anytime!